Home » Articles posted by Herbert Ortiz
Author Archives: Herbert Ortiz
Raccoon Removal Services
Raccoons are carriers of bacteria and diseases that pose a threat to both people and pets. They can spread salmonella, E coli, leptospirosis, canine distemper, histoplasmosis, and roundworm.
 They can also cause property damage and create messes. Preventative measures like putting away garbage, sealing trash cans, and using visual and sound deterrents are often enough to keep them off your property. A professional Raccoon Removal Service Texas can help you.
Humane trapping
Raccoons are one of the most destructive “pest” animals that can wreak havoc on gardens and trash cans. They can also carry germs that can make people and pets sick, so if you have a problem with raccoons, it is important to call a professional to humanely trap them and relocate them. This service will cost anywhere from $200 to $500, depending on the extent of the damage and whether there is a nest. If there is a nest, it will need to be removed manually.
There are several types of humane traps available, and it is essential to choose a cage trap that is large enough to capture a raccoon. It should be made of heavy steel wire and have a door with a spring mechanism and a drip pan. Several different baits can be used to lure the raccoon into the trap.
If a raccoon is not going into your trap, try changing the bait or moving it to a different location. If it is still not going into the trap, check for food sources that may be attracting it. If you have a cat or dog in the area, put some of their food in a container outside the trap to distract it. Also, if it is hot outside, you should place the trap in a shaded area and check it more frequently.
Live-hold trapping systems can be a great solution for raccoons in homes or yards, but they are not without their risks. When an animal is trapped for its fur, it can experience stress and physical injury, which can result in illness or even death. Moreover, it can lose its fear of humans and become aggressive.
In addition, these traps are expensive and difficult to use. They require frequent monitoring, which can be difficult for homeowners to manage. Furthermore, they often cause damage to property, such as tearing down an outdoor shed or rolling up sod. Nevertheless, they are sometimes the best option when a raccoon has learned bad habits that cannot be modified.
Exclusion
Raccoons have become one of the most common nuisance animals in both urban and suburban areas. They are attracted to trash cans, dumpsters, pet food, and houses, where they can rip holes in the roof to set up denning areas, raise litter of babies, and chew through ducts, pipes, and walls. They also spread disease with their feces. Raccoons are also the most common carrier of rabies endangering people and pets.
While preventative methods like putting in place barriers, removing food sources, and keeping garbage cans closed can help to deter raccoons, they are not always effective. The best way to eliminate a raccoon problem is by hiring a professional wildlife control company with proofing and exclusion experience. These professionals can repair the damage done by the raccoons and prevent future invasions.
If raccoons have already made their home in your attic or crawl space, a professional can humanely trap them and release them elsewhere. These companies typically charge an inspection fee for this service. They will also offer to do exclusion work that will keep the raccoons from coming back. These techniques may include sealing off entrance points to the attic, blocking access to chimneys, and placing barriers around your shed or garage.
The cost of raccoon removal will vary depending on the extent of the problem. For example, if the raccoons have destroyed a part of your roof, you will have to pay for roof repairs. This can add up to hundreds of dollars, but it is worth checking your homeowner’s insurance to see if pest-related damages are covered.
In some cases, raccoons will enter homes through pet doors and crawl spaces. In these situations, a trapping and exclusion process is necessary to ensure the safety of pets and children. A trained technician will inspect the property to determine how the raccoons got in and then take steps to keep them out.
Many pest control companies and nuisance wildlife trappers use cage traps to get rid of raccoons. While this method can get rid of the animal quickly, it is not considered humane or ethical and does not provide a permanent solution to the problem. A skilled wildlife management professional can often solve a raccoon problem in just two or three service visits and less than a week total, with the right tools and preventative measures.
Fogging Agents
While raccoons may look cute, they are often considered pests. They can cause damage to your home, garden, and trash cans, and can spread diseases through their feces. They can also injure or kill pets and people. This is why it’s important to call a professional animal control service. They can help you trap the raccoons safely and humanely and prevent them from returning to your property.
Foggers are a common method of raccoon removal, but they can be harmful to wildlife and humans. They are usually formulated to target insects and may not be effective against raccoons. Foggers may also contaminate the environment with toxic chemicals, posing health risks to humans and wildlife. In addition, they can be dangerous for children and pets. Therefore, it’s best to use non-toxic raccoon removal methods instead of foggers.
Another popular raccoon removal service is to use exclusion barriers. This can be used on buildings, porches, sheds, and other ground structures. It can be costly, but it will keep raccoons and other animals from accessing the area. This will prevent them from causing further damage to the area and prevent them from breeding.
The cost of a raccoon removal service depends on the severity of the problem and how much damage they’ve caused. An inspection is the first step and will give you an idea of how much the service will cost. It will also tell you if any special circumstances might affect the price, such as the presence of babies or a den.
After the raccoons are removed from your attic, they will leave behind a mess that can require professional clean-up and sanitization. The soiled insulation will need to be replaced, and the attic should be sanitized with an odor enzyme treatment. In addition, the pheromones and urine markers that raccoons leave behind will need to be eliminated.
It’s best to hire a professional raccoon removal company to avoid harming the animals. These creatures are smart and resourceful, so it’s essential to know how to deal with them properly. A professional will have a thorough knowledge of the raccoons’ behavior and physiology. In addition, they will use a variety of non-toxic raccoon removal techniques.
Dead Animal Removal
When animals die on or near a home, business, or other property, it’s important to have a wildlife removal company remove the carcasses. This can help prevent the spread of bacteria and disease to humans, pets, and other animals that might come in contact with the carcass. It can also prevent odors from the rancid animal. Dead animals are also an attraction for parasites and other pests that seek out a new host.
Raccoons, squirrels, opossums, deer, and other animals that live in or around homes, multiunit buildings, or commercial spaces often cause problems by digging through ductwork, entering attics, walls, and basements, creating messes, leaving waste, urine, and feces, or making damage to landscaping or outdoor structures. These critters can also carry diseases and leave behind contaminated trash. Depending on the type of animal and the extent of the problem, the cost of wildlife removal can vary from $100 to $1,000.
The simplest wildlife removal jobs, such as trapping a single snake in a yard or removing a possum from the attic, can be done for less than $150. However, if the animal has been living in or under your house or building, you’ll likely need to have the area cleaned and repaired as well. In most cases, a full wildlife removal service includes an inspection of the animal and its environment.
On average, raccoon removal services cost $400 to $600, which includes live trapping, sealing off entrances, and relocating the animal. The price will be higher if the raccoon has babies or a nest that needs to be removed.
Rats, mice, and other rodents can be costly to remove. These animals cause structural damage to homes, businesses, and other buildings, destroy landscapes and gardens, and leave feces, urine, and droppings everywhere they go. They are also known to carry many types of diseases and parasites, which can pose serious health threats.
Bats, voles, skunks, and groundhogs can be expensive to control as well. These animals burrow and tunnel through lawns, foundations, gardens, and fences. Their tunnels can also damage underground sewer lines, water lines, and electrical wiring. They may also cause a loss of crop production and ruin gardens, crops, and trees. Getting rid of these critters requires the expertise of a professional wildlife exterminator, who can use repellents, trapping, and lethal methods to eliminate them.
Carved Concrete Contractors
Starting a concrete business requires a thorough market analysis, the right tools and training, and obtaining all necessary legal licenses and permits. Those requirements vary by state.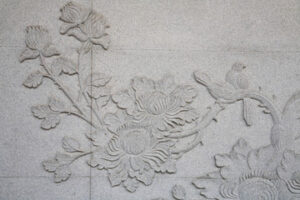
Carving into a fresh concrete mix can give homeowners and businesses a one-of-a-kind decorative accent that can look like stones, rocks, or chiseled wood. It also brings life to plain walls. Contact Carved Concrete Contractor for professional help.
Carving concrete in relief is a way to add a unique and distinctive decorative element to walls, patios and other surfaces. Concrete contractors who have the proper tools and training can create stunning one-of-a-kind pieces that can truly set a home or business apart from all the rest. This sculptural technique uses a specialized concrete mix that contains finer grades of sand and polymers than standard concrete. This makes it easier to shape, stamp, color and carve into. It also holds its shape and texture longer, making it a great choice for outdoor projects.
For those who are interested in learning this art form, it’s recommended that they begin by creating a simple project such as a steppingstone or bird bath. This will allow the new carver to gain confidence and experience before attempting larger projects, such as vertical concrete carving. It’s also important to wear a dust mask and gloves while working with concrete, as it contains silica, which can irritate the skin and lung tissues when inhaled over an extended period of time.
Relief sculpture is an ancient art form that involves chiseling away the background to make sculpted objects seem as though they are elevated above a solid surface. It’s an art form that never fell out of favor, and even today, it’s still a popular option for many artists. It’s seen in works like the Nimrud ivories, Late Antique Consular diptychs and the Berthouville Casket. It’s also used by contemporary artists to play with scale and form.
Stamped Concrete
Stamped concrete is a popular way to add the look of stone, brick or wood to patios, walkways and driveways. Installation professionals level and pour a new slab of concrete, then use rubber stamps or skins to texture the wet cement so it takes the shape of the material it’s supposed to mimic. The concrete dries, and contractors apply concrete stains to color the stamped concrete. The finished product can resemble pavers, bricks, slate, natural rock or even wood planks.
If the concrete is poured and textured right, it should have a smooth surface without any holes or cracks. The contractor will then spray a membrane-forming curing compound over the entire surface, and he or she may also add an additive to improve the strength of the concrete.
The next step is to apply a concrete coloring mix that matches the shade of the bricks, pavers or stone that the concrete is supposed to imitate. The contractor will also use an accent color to give the concrete dimension. The accent color is often mixed with a concrete release agent, which has a nonstick effect that helps concrete stamps come off cleanly once the concrete has dried.
Once the concrete is stained and cured, the contractor will apply a sealer to protect it from dirt, rain and sun damage. A reseal every two to three years should keep the concrete looking fresh. If the concrete is exposed to a lot of traffic or wear, it may need an additional coat of sealer, which can add about $1 per square foot to the cost of the project.
A carved concrete patio, walkway or driveway can enhance your property’s curb appeal and increase its value. However, this type of project is challenging and time consuming, so it’s best left to professional contractors who have experience working with concrete.
When hiring a carved concrete contractor, make sure they’re licensed and insured. They should have photos of previous work, as well as references from satisfied clients. They should also be able to provide you with an estimate for the job before starting any work.
Vertical Concrete Carving
Concrete sculptors can take decorative concrete beyond stamped patios and sidewalks to add unique architectural elements to walls, water features and other vertical surfaces. For example, a contractor can carve concrete to look like stones, rocks or chiseled wood and then stain or color the material. This can make a wall or other surface stand out or create an interesting focal point in a room.
Although concrete carving has been around for decades, it’s becoming more popular in residential applications such as fire pits and seat walls that mimic rock, says Emil Gera of Gera Concrete in Weatherly, Pennsylvania. He has found that homeowners are seeking unique designs for their backyards, but some are also looking for design elements to transform living rooms or other interior spaces.
Gera recommends using a concrete mix designed specifically for vertical stamping and carving, such as Kingdom Products Imperial Vertical Carving Mix. The product is lightweight and exceptionally strong and can be carved, textured and stamped to produce stone, brick or block designs. It is easy to work with and can be applied up to 5 inches thick on a properly prepared surface.
Another option for a versatile vertical concrete mix is Tru Pac X, which is an additive that’s mixed with 80-lb bags of standard Type S mortar to produce a high-performance, reusable stampable/carving and vertical mixing mix. It can be used on both a cement or EPS foam substrate.
Regardless of the material or technique, it’s important to prepare the surface for vertical concrete carving properly. This includes ensuring proper formwork and reinforcement, as well as cleaning the shotcrete before applying the base coat or carving mix. It’s also a good idea to mist the surface of the base or sculpting mix regularly to help control moisture loss.
Finally, it’s important to use the right tools for each phase of the job. A hand carving tool is useful for sculpting into the wet concrete and a power tool can be helpful when carving detailed shapes and joints. It’s also a good idea for contractors to wear gloves and a dust mask when working with concrete, as it contains silica that can irritate the skin and lungs over a long period of time.
Etching or Engraving
There are a number of decorative treatments available for freshly placed concrete, including pattern stamping, exposed aggregate and textured overlays. However, if you have existing plain gray concrete that needs a little more decorative flair, engraving or etching is the way to go. These processes use special tools to cut patterns and designs into cured concrete, leaving one-of-a-kind markings or designs that can be further enhanced with staining. Unlike overlays, which are added as a polymer layer on top of the concrete and must be sealed, etched or engraved concrete is carved directly into the surface and is a permanent treatment.
While many people are familiar with the decorative potential of concrete for floors, sidewalks and driveways, fewer are aware that this durable material can also be used to sculpt and shape unique rock and wood-like accents on walls and other vertical surfaces. This unique technique allows contractors to carve concrete into surfaces that resemble stones, rocks and even chiseled wood, and can transform dull basement bars and unsightly foundations into distinctive living spaces and home amenities.
To create the illusion of a carved surface, contractors level and pour a new slab, then use rubber stamps to press and tamp it so it takes on the shape of bricks, stones or wood planks. When the concrete dries, contractors apply concrete stains to color the new surface and match it to the stone or wood they’re mimicking. The resulting finish looks like natural stone, pavers or wood and is long-lasting, low maintenance and slip-resistant.
When it comes to creating the etched or carved appearance, the main difference is that engravings are drawn with sharp, pointed tools while etching is done with acid. When the acid interacts with the metal it etches the soft surface beneath, leaving behind the engraved or carved line. While etching is commonly used on metal plates for printing, it’s also a popular art form and a great option for homeowners who want to add an artistic touch to their concrete.
Fortunately for experienced decorative contractors, there are now a few specialized machines designed to help them master the art of carving concrete. Two patented systems, Engrave-A-Crete and KaleidoCrete, arm them with all the tools they need to cut an endless array of patterns into concrete and achieve professional results. Darrel Adamson, whose background includes remodeling contractor work and a stint as a decorative concrete contractor, developed both of these innovative tools and now trains contractors worldwide through his company, Engrave-A-Crete.
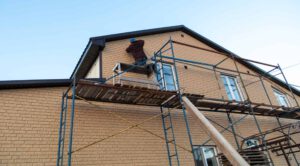
Repairing Your Home’s Exterior
Keeping your home’s exterior looking good doesn’t just increase curb appeal. It also helps protect your house from water damage and other problems that can lead to costly repairs. For more information visit Siding Companies Charleston SC.
Replacing home siding can be a major expense, but it’s usually only necessary when the damage is severe or spreads to the entire house. Smaller issues like dents can be repaired in a much more cost-effective way.
When cracks in your siding occur, you need to address them quickly before the problem worsens. This is because cracked siding can lead to water damage, mold growth, and structural issues. In addition, ignoring these problems can affect the appearance of your home and its value. However, fixing cracks in your siding is a fairly straightforward process that can be accomplished with a few basic tools and supplies. By assessing the damage, gathering necessary materials, and taking proper safety precautions, you can successfully repair your cracked siding.
Before beginning a project to repair cracked siding, choose a day free of bad weather. Getting caught in the rain halfway through a repair project can ruin your work and leave you with an unsightly mess. Also, clean the area around the damaged siding using soap and water before you begin. This will help ensure that your repair materials adhere properly and provide a smooth, clean finish.
Next, locate any trim or molding covering the edges of the affected panel. If there is any, remove it using a pry bar or hammer. Then, find the nails or fasteners securing the panel to the underlying structure and carefully remove them. You may need to use wood shims to prevent further damage to the surrounding siding as you do this.
Once the underlying structure of the affected panel is free, apply adhesive or caulk to the back of a replacement piece and secure it in place. Use a nail gun or hammer to drive in the nails, being careful not to over-tighten them and to allow for natural expansion and contraction. Once the replacement panel is in place, reinstall any trim or molding removed and touch up any paint where needed.
While you are at it, be sure to inspect the rest of your siding for any signs of damage or wear. Note the type of cracking or warping occurring so that you can address the problem in the same manner when you are ready to do more extensive repairs.
Whether your home’s siding is made of brick or aluminum, a hole in the wall can be a real eye-sore. Luckily, both types of siding follow similar installation and repair processes.
If the damage is minor, a little color-matched caulk can help hide it and create a clean, finished appearance. If the hole is large, you may need to replace the damaged section of the siding.
Before beginning any work, you should thoroughly inspect the damage and assess its structural integrity. If the damage is severe and threatens the stability of your house’s exterior, it’s best to contact a professional for assistance.
To repair a hole in aluminum siding, you must find a suitable filler for the gap. Depending on your siding type, you may need a spackling compound, wood filler, or another product. It’s important to choose a filler that is compatible with your siding material and applies easily. For the smoothest finish, you should use a putty knife to spread the filler.
Fixing a hole in brick siding is slightly more complicated but still fairly straightforward. You will need a mortar mix that closely matches your brick’s color, a bucket, and a trowel. You’ll also need a sponge and a brush to help smooth the mortar and add texture. The mortar should dry completely before you can reattach the piece of siding.
If you’re repairing a hole in vinyl siding, you can take a few extra steps to ensure a smooth, seamless look. Start by cleaning the area around the hole with a mild detergent solution and then rinsing it thoroughly to remove any remaining dirt or debris. Once the area is clean and dry, load your caulk gun with an exterior-grade caulk that matches your siding. Apply the caulk to the punctured area, overfilling it slightly. Then, smooth out the caulk with your finger or a putty knife.
For larger holes in vinyl siding, you can use a zip tool to unlock the lower lip of a matching siding piece, then place it on top of the damaged section with construction adhesive. If you can’t find a replacement piece of vinyl, use foil tape to cover the hole and then lap a sheet of new vinyl up to and behind both courses of siding above it.
Mold is a type of living fungus that can grow on the surface of vinyl siding and other materials when the conditions are right. It thrives in dark, warm, humid environments and can damage or discolor surfaces. Mold can also cause health problems for those living in the home.
If your home has mold growth, it’s important to act quickly to remove it. Otherwise, the spores can spread to other home parts and wreak havoc. Mold is typically black in appearance, though it can also be green or gray. It can also look like streaks or dots.
To prevent mold from growing on your vinyl siding, keep it clear of debris and plant growth. Trim any trees or bushes too close to your house, which can block sunlight and prevent air from circulating properly around the siding. It’s also a good idea to clean your gutters regularly, as clogged gutters can lead to water damage that can encourage mold growth.
If you spot any signs of mold or mildew on your siding, you can easily remove it yourself. Start by cleaning the area with a hose or pressure washer. Light accumulations usually come off with just a little bit of spray, while more serious spots may require the use of an appropriate cleaning solution. If using a cleaning solution, wear the proper safety gear. This should include disposable gloves, goggles, and a mask to protect yourself from direct contact with and inhalation of mold spores.
Once the area is free of dirt and mildew, use a brush or sponge soaked in your chosen cleaner to scrub the moldy areas. Be sure to use firm but controlled pressure, and pay special attention to deep-seated or stubborn stains. Once the moldy areas are cleared, use a hose or pressure washer to rinse off the siding.
Once the area is cleaned, you can patch any holes with a plywood patch. Cut a piece of plywood to a size that is slightly larger than the hole in your siding. Apply a bead of adhesive caulk around the edges to help hold the patch in place.
Loose siding can be a major issue for your home. It can lead to water infiltration, rot, and pest infestation. Loose siding can also impact the look and value of your home. However, loose siding can be repaired easily and quickly.
Typically, the cause of loose siding is age and wear. This can make the material brittle and cause it to loosen. Severe weather conditions, such as hail and wind, can also reduce and rip away sections of siding. This can be especially true for vinyl siding, which is prone to damage from wind and hail.
One way to fix loose siding is to tighten the fasteners that hold it to the wall. This can be done by using a tool called a siding unlock tool, which is available at most hardware and home improvement stores. This tool is designed to help you easily remove a loose panel of siding from your wall without damaging it or the surrounding panels.
If tightening the fasteners does not fix your loose siding, you may need to reattach the damaged panel. This can be a time-consuming process, but it is necessary to ensure your siding is secure and safe for use. To do this, you must position yourself on a ladder near the area of the damaged siding and prepare your tools. Before attempting this, it is recommended that you check for other signs of damage, such as rotting or mold, which may indicate the need to replace your siding.
Once you have positioned yourself on a ladder, carefully examine the area of the damaged siding to determine what needs to be repaired. If you are still looking for what is wrong with the siding, it is a good idea to have a professional inspect your property.
If you decide to repair the damaged section of the siding, start by removing the old panel. Once the panel has been removed, measure the space to make sure that you have a replacement patch that is the same size as the removed piece. Then, cut a new vinyl siding two inches wider on each side than the damaged panel. This will give you room to work and ensure the patch fits well. Once the vinyl patch has been cut, apply a bead of caulk to the back of the panel and the area surrounding the hole or crack. This will help to prevent the patch from coming loose again in the future.